A guide to Xenforo attachments / photos
Some useful info about attachments/fotos in Xenforo:
Where are attachments stored?
If you were used to vBulletin there was a setting if you want to store the attachments in the file system (doesn't stress your database) or in the database (prohibits synchronization problems if you use several servers).
Xenforo stores them solely in the file system.
How are the files organized?
vBulletin used the userid for the structure of the directories. In Xenforo its slightly different:
The directory for the avatars are based on the userid, for all other attachments a sequential number is generated, the attachment id, a number which shows up also in the file name.
location for attachments: internal_data/attachments
location for thumbnails: data/attachments
You can change this path in config.php:
$config['internalDataPath'] = 'new_internal_data_path';
To both types of attachments applies: for every 1000 files a new directory is created. Attachments with id 0-999 can be found in directory 0, id 1000-1999 are in directory 1 and so on....
How are the attachments linked to content (database tables)?
- xf_attachment is the link between content (post) and attachment, it also contains the date and the number of views
- xf_attachment_data is the link between user and attachment and also contains file name, file size, thumbnail size
- xf_attachment_view is a memory-based table used for storing view data.
Important info for photo communities:
The problem:
- If you set the "Maximum Attachment File Size" too small (e.g. the default 1 MB) your users are frustrated because a typical photo today is larger and they get an error message. Then they either give up or use one of the online picture tools
- If you use a higher setting (e.g. 10 MB) the users are happy because they can upload all their photos, but now the admin has a problem due to increased disk space usage, increased backup time, increased traffic
The solution:
- Set the "Maximum Attachment File Size" to something useable (e.g. 10 MB)
- Set "Maximum Attachment Image Dimensions" to e.g. 800x600 pixels or 1200x1000 pixels
This way the users are able to upload large photos but Xenforo automatically resizes the photo after the upload to the maximum dimension!
An example:
Photo xyz.jpg
File size 4 MB
Original: 2816x2112 = 5.947.392
Maximum set to 1200x1000 = 1.200.000
Photo will be resized to 1200x900 and uses only 350 KB.

[DOUBLEPOST=1382536396,1382536253][/DOUBLEPOST]
Dreamweaver XenForo Template Syntax Highlighting Configuration
If you are using Adobe Dreamweaver to edit XenForo templates via WebDav (or even via copy-and-paste), you may be wondering how to get syntax highlighting and code completion working.

Unfortunately, it's a little long winded, but if you follow these instructions you should be fine. These instructions are for Dreamweaver CS5, but the principles are the same for previous versions as well.
First, download and decompress the XenForo-Dreamweaver.zip package attached to this message. Unpack it, and you will find two directories:
CodeColoring and
TagLibraries.
Secondly, ensure that Dreamweaver is not running. Quit it and make sure it has fully exited before proceeding.
Next, you will need to find your own Dreamweaver configuration directory. The exact location of the directory depends on your operating system, account name and Dreamweaver version, but here are two examples that should help you find yours:
- Mac OS:
/Users/[YOUR ACCOUNT NAME]/Library/Application Support/Adobe/Dreamweaver CS5/en_US/Configuration
- Windows:
C:\Users\[YOUR ACCOUNT NAME]\AppData\Roaming\Adobe\Dreamweaver CS5\en_US\Configuration
Once you have found your Dreamweaver configuration directory, note that it contains directories including
TagLibraries and
CodeColoring. If for some reason it does not, don't worry, just create them.
I recommend that you back up your original
CodeColoring and
TagLibraries directories at this point.
Let's start with
CodeColoring.
- Within the CodeColoring folder from the zip, you will find a file called Colors-XenForo.xml.
- Within the CodeColoring folder from your Dreamweaver configuration directory, you will find a file called Colors.xml.
- Open both these files in a plain text editor.
- You must now copy all the <tagColor /> tags from Colors-XenForo.xml and paste them into the <colorGroup doctypes="HTML"> tag of Colors.xml before the final closing </colorGroup> tag.
- When you finish, save the file.
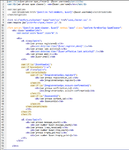
- The end of your Colors.xml file will look something like this:

Next,
TagLibraries.
- Copy all the directories from the TagLibraries folder from the zip, into the TagLibraries folder in your Dreamweaver configuration directory.
- Locate TagLibraries-XenForo.vtm from the zip and TagLibraries.vtm from the Dreamweaver config directory
- Open both these files into a plain text editor. They are XML files.
- You will need to copy all the <taglibrary> tags from TagLibraries-XenForo.vtm file and paste them into the <taglibraries> tag of TagLibraries.vtm, before the closing </taglibraries> tag.
Load up Dreamweaver and you
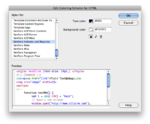
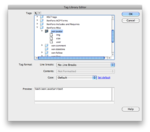
should find that you have a bunch of new tag libraries defined, and the ability to apply syntax highlight and choose a colour scheme for various XenForo template tags.


[DOUBLEPOST=1382536725][/DOUBLEPOST]
[ValveTime.net] LinkedIn Share Button 1.1
http://xenforo.info/resources/valvetime-net-linkedin-share-button.1159/


